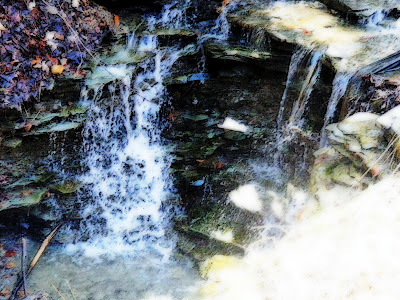
Ok so on to the point of the post. I took advantage of the weather on Sunday and went for a walk with my camera. So today I'm going to show you how I took this photo

and turned it into this.
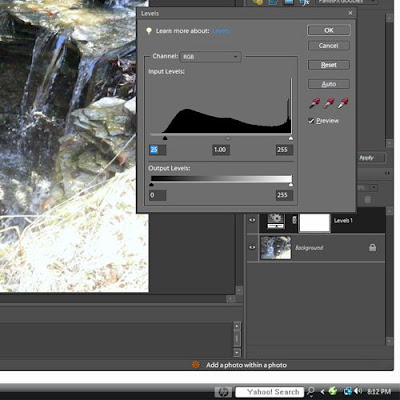
First I opened up the picture in photoshop elements. I adjusted the levels to begin with by using the levels adjustment layer. Click ok and merge down.
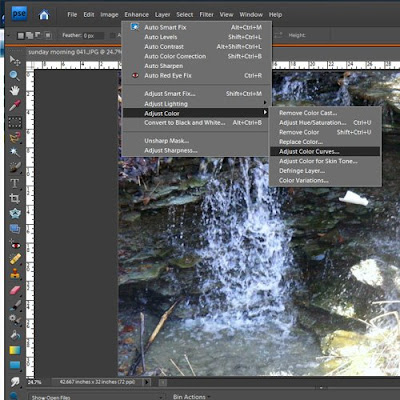
Next I went to Enhance > adjust color > Adjust color curves and chose increase contrast. Depending on the picture you use, choose whichever gives you the look you want.
Now I duplicated layer 1 twice. The second layer I named screen and changed the blending mode to screen. Layer 3 I named blur. Then I went to Filter > blur > gaussian blur and set the radius to 18.7. What you are going for here is to blur so that you can just barely make out the features on the picture. What you set the radius at will depend on your picture. I changed the blending mode on layer 3 to multiply
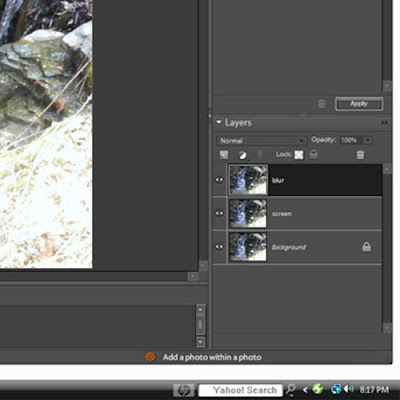
When this was complete I right clicked in the layers palette and clicked merge visible
Next I went to photo effects, chose pencil sketch. This will put a pencil sketched layer above your picture. I then duplicated the pencil sketch layer, changed the blending mode to multiply and merged down
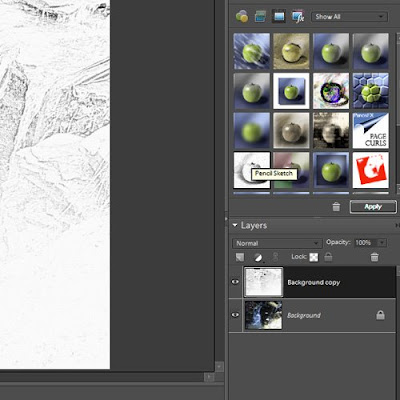
Now you are back to layer 1, which is your picture, layer 2 which is your pencil sketch. I changed the blending mode to soft light, merged down.
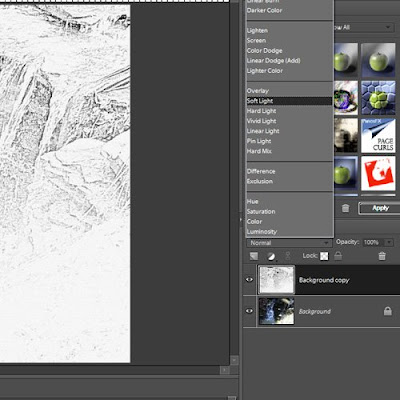
The next step was to go to Filter > artistic > rough pastels
The settings were as follows: stroke length 7, detail 4, scaling 67, relief 22, light bottom. I'm a little confused here though. Those are the settings I wrote on the piece of paper when I was taking notes on my edit, but in the screen shot below the numbers are totally different....lol I'm not quite sure what happened there. If you try this you can try using both sets of numbers or just come up with your own. (sorry about that one)
And that's it. Go ahead and give it a try and see what you can come up with for your pictures.
As a side note. The first part of this tutorial, which would be everything up to the pencil sketch part, is what's known as the Orton effect. That alone will make a picture look really awesome. I can't remember where I found that tutorial so my apologies to whomever I got it from for not sharing your link here.
Hope you enjoyed my little tutorial.
Hope you enjoyed my little tutorial.


No comments:
Post a Comment