I had said some time ago that I would do a tutorial on drop shadows and I finally got around to making good on that promise.
You'll have to excuse the horrible screen shots. For some reason I can never get them to look very good. Hopefully you'll be able to get the idea of what I'm talking about here though.
Lets start with why you need them. If you just layer pictures and elements on a background paper all you are going to end up with is a flat image. When you add drop shadows to the layers it gives it some dimension and adds a touch of realism to it.
I'm going to show you two different ways that you can add a drop shadow. (done in photoshop elements 7)
The first is the easiest way, however, it doesn't give you as much flexability.
Make sure that you have selected the layer that you want to add the drop shadow to.
Go to the effects palette and choose layer styles (indicated by the circle at the top of the screen shot) then from the drop down menu choose drop shadows.
For the example I chose the one indicated by the arrow.
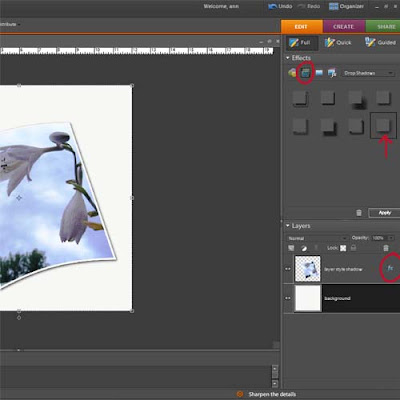
Notice the circle at the bottom of the screen shot. If you double click on that a window will pop up that allows you to adjust the shadow. You will be able to adjust the angle, size, distance, opacity and color. The next picture is what you will end up with.
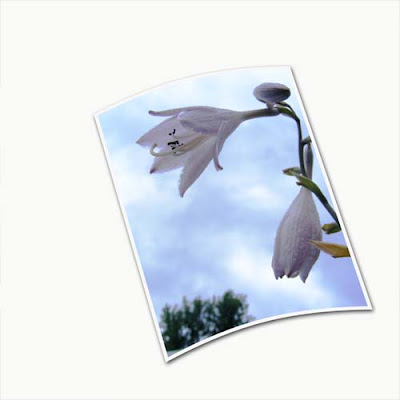
That's not so bad looking, but there's nothing more I can really do with it.
Here is another method that allows you more flexability because it puts the drop shadow of it's own layer.
In the screen shot below notice the red circle. While holding down the control key click your mouse in the area indicated by the circle. This would of course be on the layer of the object you want to add the shadow to. Notice the marching ants around that object now.
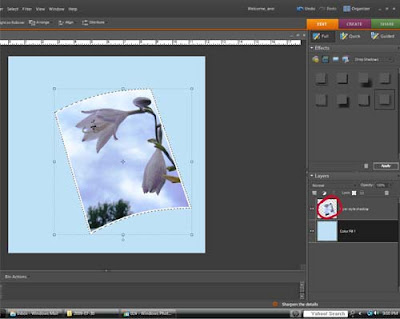
Now that you have the selection loaded add a blank layer below that layer.
Next go to select > feather and enter a value. (I usually choose 10)
Hit the letter D on your keyboard to set the colors to default and with the paint bucket tool selected fill the selection with black on the blank layer. You now have a drop shadow below your object.
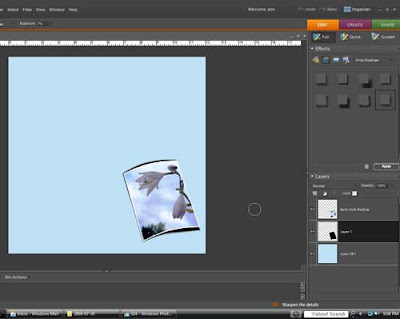
(I should mention here that the picture in the screen shot wasn't how it looked at first. I played with it a little and forgot to leave it the way it originally looked. OOPS)
This is what you can do with you drop shadow now.
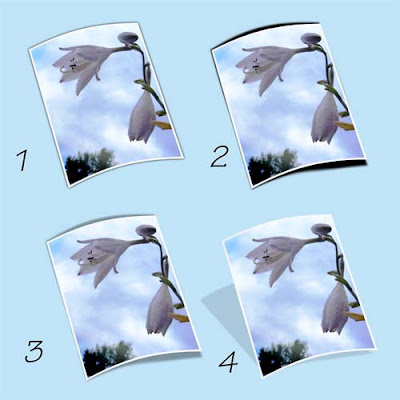 Image 1
 is how it will look if you follow all the above steps. It pretty much looks about the same as it did using the first method.
Image 2 I used the smudge tool to drag the shadow out slightly
Image 3 this is the same as 2 but with a lowered opacity. I think I took it down to about 25%
Image 4 For this one while holding down the control key I dragged the corners of the shadow out which gave it the appearance of being farther away from the background page.
Now that you know how to do it, go out and cast some shadows.


