Sunday, April 25, 2010

FYI

Did you ever have one of those days where there was just...
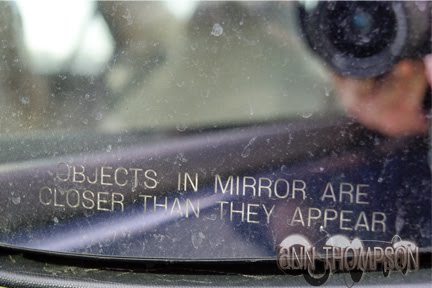
 Or at least nothing that you want to do? Well maybe you don't but I have days like that all the time. On days like that my mind just sort of wanders. I start thinking about things. You know those lists people come up with about things that make you go hmmmm? Sometimes those are the things I think about. I got to wondering if it's true that...
Now some times my mind does a bit of a free association type thing. Naturally this led me to think about how some things may seem bigger than what they really are. Size led me to wonder if some of you might be curious about how big Duke is. Naturally I had to do a test so that none of my readers would ever have to wonder about their favorite canine. I went ahead and measured Duke for you.
I didn't take a picture but I also measured the span between my thumb and index finger. It's roughly six inches. So now you all know that Duke is approximately six inches in size. Hmm and I thought I didn't have anything to do today. Guess I was wrong.

Saturday, April 24, 2010

The Brenda Photo Challenge (4-24-10) Lighting

It's another Brenda photo challenge. This one I found to be a little difficult. The subject was lighting and this is what it said:
Alright! This is pretty well self explanatory! Just show how YOU would light your subject...Any subject!! Just show us Your way of doing it! OR...like the photo above, CAPTURE the lighting...Got it? Well, then, GO for it and just have FUN with it!
I was pretty stumped on what to do. First of all I'm a mere amateur photographer that barely knows her camera. I'm not saying that I can't take a decent picture now and then but lets face it, I'm no pro. I don't own any fancy lighting or any special lighting for that matter. So after establishing the fact that I have lighting envy I set out to get a picture that would fit.
Ok, I could give you a picture of an incandescent light bulb because that's how I would light my subject if I was taking a picture in the house at night. NAH, don't like that idea. I finally decided that my light source is mainly natural light. With that being said, here is my entry.
Now why not go check out the rest of the entries in the Brenda Photo Challenge

Friday, April 23, 2010

Yesterday I showed you how I made my textures. Today I'm going to show you a couple things I did using them. I wanted to combine several pictures to create something along the lines of a collage. I don't know if that's what these could be considered or not but I was happy with how they came out.
This was the dandelion picture I used yesterday with a picture of daffodils added and a third spring flower picture on top of that. It's basically the same procedure as in creating the texture. Here there was more erasing involved to get just the look I wanted. Of course it was topped off with the texture. This one is currently my desktop wallpaper. I'm really liking how it looks. I'm thinking this would also make a great greeting card.
After I did that one, I tried it with those pictures I showed you from Amanda. I figured the flowers and the butterflies together would look pretty cool.
 I loved the way this one looked too. Being me though I couldn't stop here. With this same picture I did one little thing that totally changed the look. All I did was hit cntrl + I on my keyboard and I got this.
 I can't decide which version I like better.

Thursday, April 22, 2010

Textures

I always love the way the addition of textures adds to a picture. Ever since I discovered the technique I've been fascinated with it. There are plenty of web sites where you can find free textures, probably just as many who will sell you some or you can make them yourself. Since I'm all about free and do it yourself, making them is right up my alley. I suppose I could just whip up a download and give you some of the ones I've done but instead I'm going to tell you how I went about making my most recent one.

I started by choosing some pictures.
First I opened up the grass picture I showed you the other day.
Then I went to file>place and chose my second picture
I changed the blending mode on this to hard light and turned the opacity down to about 80%. Then again I went to file>place and chose a third picture
This time I changed the blending mode to hue and left the opacity at 100%. I normally just keep scrolling through the different blending modes until I find something that looks good to me. It's not always the same ones but my favorites seem to be either soft light, overlay and multiply. As you can see this time I didn't use any of those but this is what looked the best this time around. You can also use an eraser to erase parts of a picture that may seem a bit too distracting or don't seem to fit well with the look your going for.
The next step was to merge the layers together. Now I could have left it as is but I chose to do one more thing which was to lower the saturation.  You can do that by either hitting cntrl+U on your keyboard or by using a hue/saturation adjustment layer. After all this there was nothing left to do but to save the file.

So lets test it out now and see how it looks on a photo. 
 I opened up this picture then went to file > place and located the texture I had just made. With the new texture as the second layer I changed it's blending mode to soft light and now the above picture looks like this.

And there you have it. Of course you could lower the opacity on the texture layer to give it a more subtle look. It all just depends on what you like. So go ahead and pull out some of those pictures you have that you don't think are good for anything and start playing around with them. You just might be surprised at what amazing textures you can come up with.
Related Posts with Thumbnails