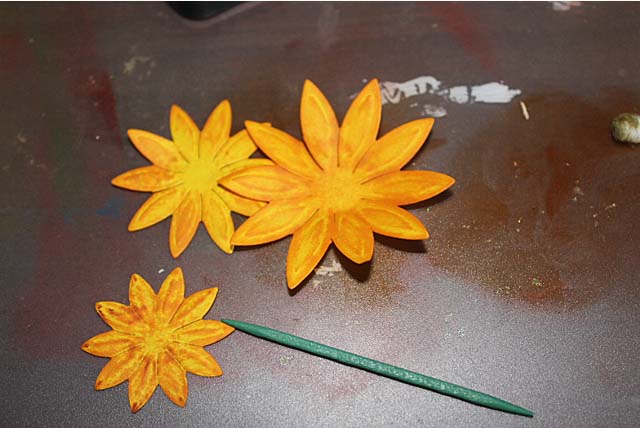
Gather the die cut flower pieces, some cotton balls and an ink pad that is either a darker shade of the color of your paper or a complimentary color. Since I didn't have a yellow ink pad I chose orange. You could also do this with a marker.
Rub the cotton ball on the ink pad to pick up some of the ink then rub the inked cotton ball on the flower pieces. You don't want to completely cover the piece just highlight certain areas like around the edges or any raised areas there may be.
Once done with that you'll need a toothpick, skinny dowel rod or something else to use to curl the petals of the flower
After you've used your chosen tool to curl the edges the pieces will look like this.
Aside from curling the petals I also pushed down in the center while pushing the petals up from the bottom to give it a slight cone shape.
Now all you need to do is grab some glue and with a dab on the center glue the layers together. You can use 2 or 3 layers depending on how big you want your flower to be.
Now all it needs is a gem or pearl in the center of it or you could even leave it plain.


19 comments:
Wow,it's gorgeous! And I learned something new! So cool!!
These are so pretty and you're so clever and sweet to make this tutorial for us.
I LOVE this technique.
They sure turn out beautiful!
I am so glad you showed us this, i had no idea how you did this, to me the non crafter this is amazing.
Thanks for sharing this technique! You are so super talented...these look fantastic!!! Annster's Domain
Thanks. I learned a thing or two spending all those hours reading crafting blogs...lol
It might not be the way the so called experts would do it but it's the way I do it.
Oh wow. I had no idea of all the steps it takes to get a flower. Beautiful.
Have a fabulous day off, Ann. Big hug to you and tons of scritches to Gibbs. ♥♥♥
That's so cool. They look so pretty.
Thank you!
You're welcome. This may not be the way everyone does it but it's how I do it
And to think years ago I would have just used the flat cut flowers and called it done.
You are very welcome
you could use a small brad in the centre to attached to your card...but then you would need to cover the metal ends inside the card...love seeing the process, thanks
Oh I love the idea of using a brad. I'll have to remember that for next time. Doing it that way you wouldn't have to worry about the glue holding either.
How pretty!I love the way the colors look - so natural.
Thank you. It's amazing what a little ink can do.
Those are really good! Prettier than the ones you buy!
Post a Comment